 Eric Sommers
1 min read
How to Handle Meraki End-of-Support Alerts Without Replacing Your Hardware
What does Meraki End-of-Support (EoST) actually mean? — and how to silence dashboard alerts without a forced hardware upgrade.

Setup, Stacking, Passwords, and Troubleshooting
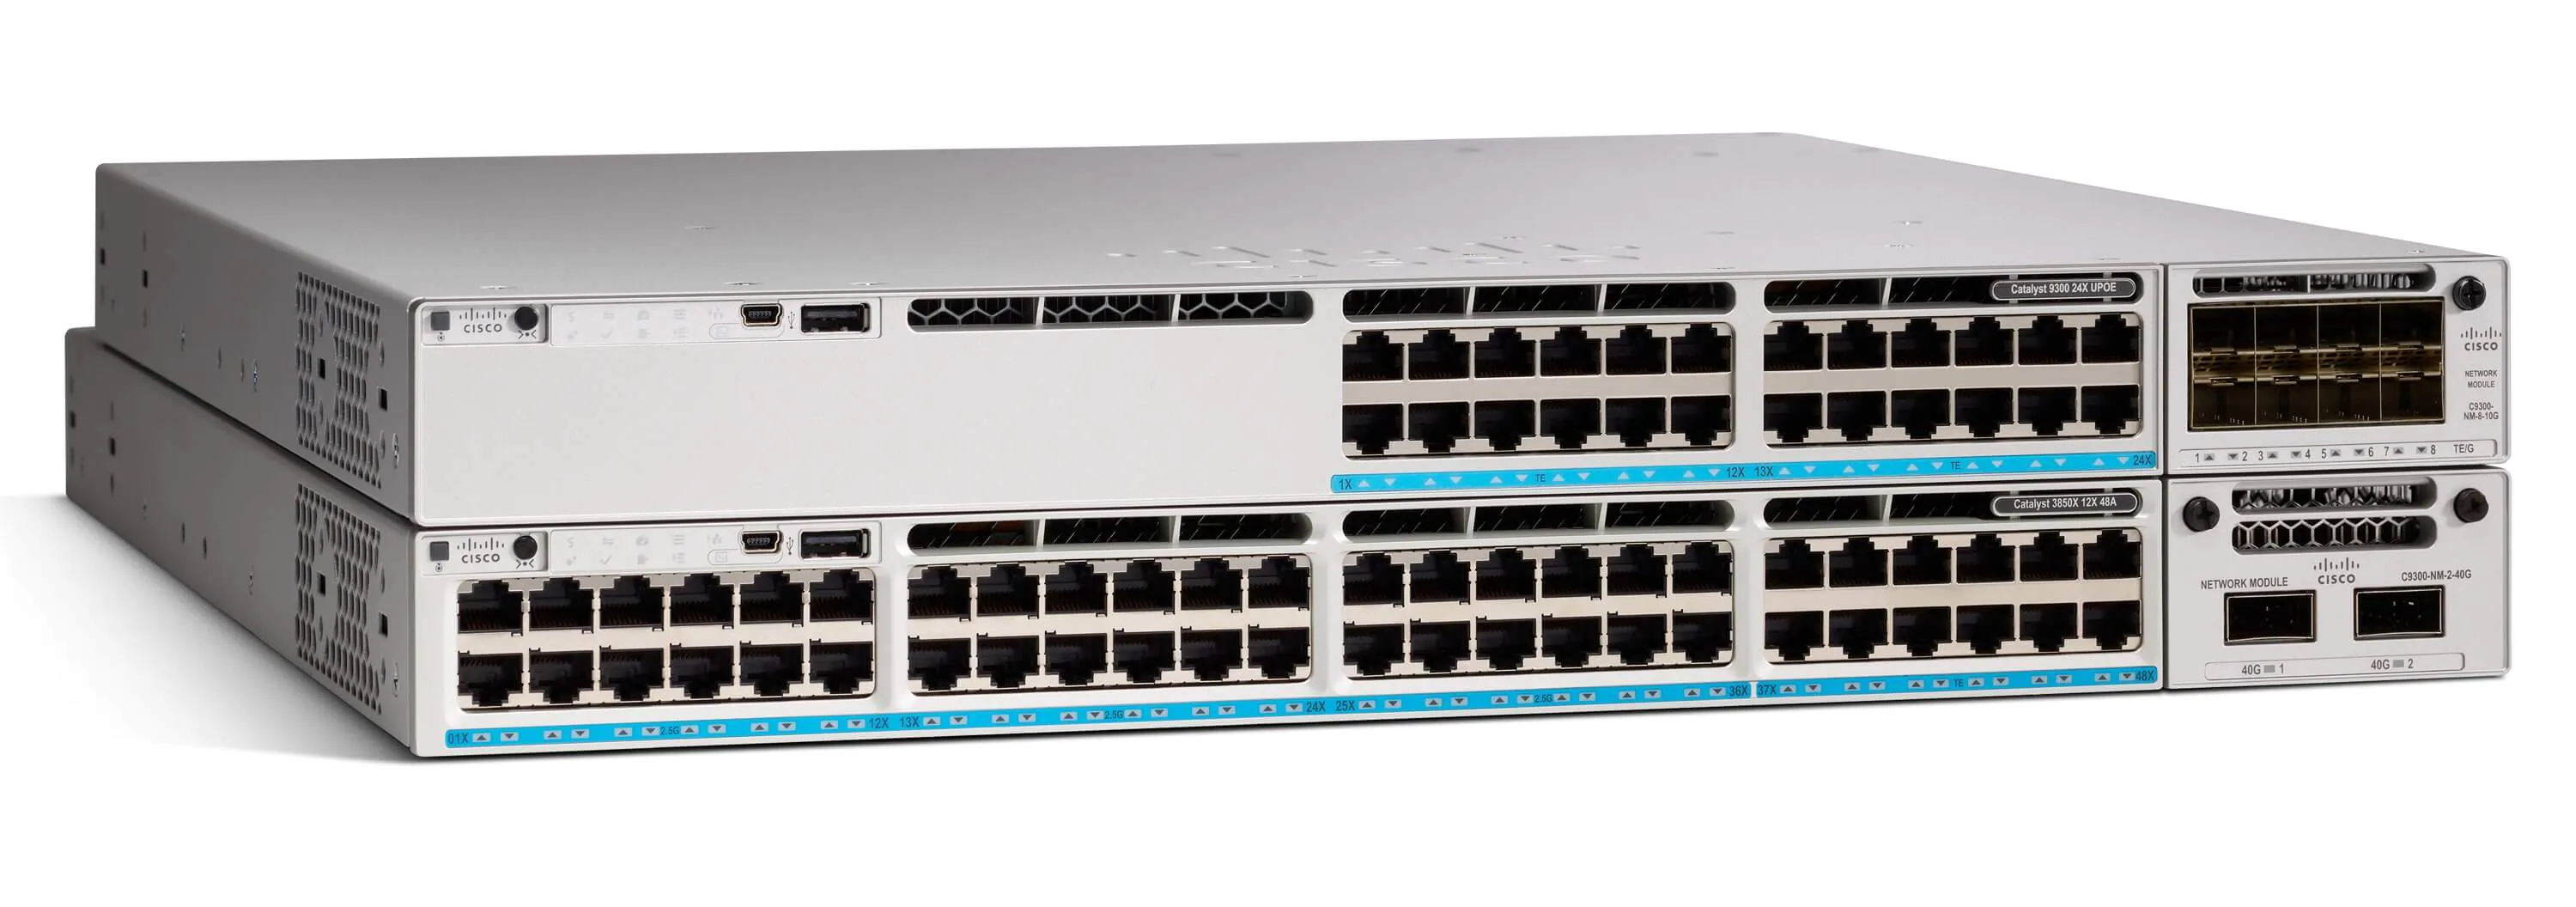
When you’re rolling out a network built for speed, scale, and rock-solid reliability, Cisco’s Catalyst 9300 series switches are hard to beat. They’re the backbone of enterprise networks, ready to handle everything from heavy campus traffic to growing IoT fleets.

Before we dive into the technical details, let’s start with a quick overview of how to get the most out of your Catalyst 9300 deployment.
Before diving into setup and configuration, it’s important to understand the full capabilities of the Cisco Catalyst 9300 series. This guide walks you through key processes including switch setup, stacking, licensing, and troubleshooting, offering a clear path for configuring your Catalyst 9300 infrastructure.
The Catalyst 9300 Series is built for businesses that don’t mess around when it comes to connectivity. With high-density 1G Ethernet ports, StackWise® virtual stacking, Layer 3 routing, and serious security baked in, these switches are designed to handle real-world enterprise demands.
Key features include:
Whether you’re upgrading an old infrastructure or starting from scratch, the Cisco Catalyst 9300 delivers serious flexibility.
Let’s start at square one: configuring your switch to join the network party.
Power on the switch, and you’re in business.
Fresh out of the box, the Cisco Catalyst 9300 typically ships with no password set — just hit Enter when prompted.
On newer images, Cisco may preconfigure a default password. (Always double-check release notes.)
Pro Tip: Never leave a production switch on default settings. Security starts at first login.
Once you’re logged in, change the credentials immediately:
Switch> enable
Switch# configure terminal
Switch(config)# username admin password Your$ecureP@ssword
Switch(config)# enable secret Your$trongEnableSecret
Switch(config)# exit
Switch# write memory
This quick configuration step ensures your Catalyst 9300 is locked down from the start.
Stacking isn’t just for cable management bragging rights — it simplifies management and boosts resiliency in Catalyst 9300 deployments.
Before stacking, check your configuration guide to ensure you're working with the right models and firmware.
Proper StackWise cabling connects each switch’s Stack 1 port to the next switch’s Stack 2 port, forming a resilient ring, as shown below

Now, here’s how you stack your Cisco Catalyst 9300 switches step-by-step:
Switch# show switch Switch# configure terminal
Switch(config)# switch 1 priority 15
Switch(config)# switch 2 priority 14
Switch(config)# exit
Switch# write memory
Setting a priority ensures that your most important device takes control during failovers.
Locked out of your Cisco Catalyst 9300? No worries — password recovery is simple.
From ROMMON:
switch: SWITCH_IGNORE_STARTUP_CFG=1
switch: boot
Once booted:
Switch# configure terminal
Switch(config)# username admin password New$ecureP@ssword
Switch(config)# write memory
Reset the startup config ignore:
Switch# configure terminal
Switch(config)# no system ignore-startupconfig switch all
Switch(config)# exit
Switch# write memory
A quick reboot later, and you’re back in business.
The Catalyst 9300 relies on Cisco Smart Licensing, and keeping your devices on the latest Cisco IOS XE versions is critical.

Switch# show license summary
If your licensing setup ever feels confusing, Cisco’s configuration guides are a lifesaver.
Switch# configure terminal
Switch(config)# boot system switch all flash:your_image.bin
Switch(config)# exit
Switch# write memory
Switch# reload
Upgrading your Cisco IOS XE software ensures your Catalyst 9300 is ready to tackle whatever your network throws at it.
| Issue | Possible Cause & Fix |
|---|---|
| Console unresponsive | Double-check cable type and serial settings. |
| Stack won't form | Verify matching Cisco IOS XE versions across devices. |
| Licensing error | Confirm internet access and Smart Licensing registration. |
| Password recovery fails | Timing is critical; press Mode button right after reboot. |
For advanced deployments or compliance-focused networks, Cisco provides a comprehensive security configuration guide tailored for the Catalyst 9300 series. These resources, along with expert support from the Edgeium team, can help ensure that every device and interface is properly configured for long-term performance and security.
Q: What's the default password for a Catalyst 9300?
A: Generally, there isn’t one. Just press Enter at the prompt. Some newer images use a predefined password.
Q: How many Catalyst 9300 switches can I stack?
A: Up to eight per StackWise ring.
Q: How do I reset a 9300 switch to factory defaults?
A: Use the Mode button method during reboot, then erase the startup config.
Q: Do I need a license to run advanced features?
A: Yes. Advanced Layer 3 and DNA features require Smart Licenses and regular software updates.
The Cisco Catalyst 9300 isn’t just a switch — it’s the foundation of your future-ready network. But setting up a network that’s built to last isn’t just about hardware — it’s about the right partner, too.
That’s where Edgeium comes in.
We boost your business by helping you create stronger, more reliable networks — all while cutting costs. Whether you need top-quality new or pre-owned Cisco gear, smart CovrEDGE™ maintenance plans, or help recovering your IT investments, we’re ready to help.
👉 Ready to put your network in motion? Let’s Talk and get started.

1 min read
What does Meraki End-of-Support (EoST) actually mean? — and how to silence dashboard alerts without a forced hardware upgrade.

1 min read
Engineer's guide to what Cisco actually asks you when you onboard a Catalyst or Smart Switch to the Meraki dashboard, and what each choice does to...
1 min read
Designed to leverage assurance, security, and automation capabilities for the Cisco SD access and DNA center, the Catalyst 9300 Switches set the...